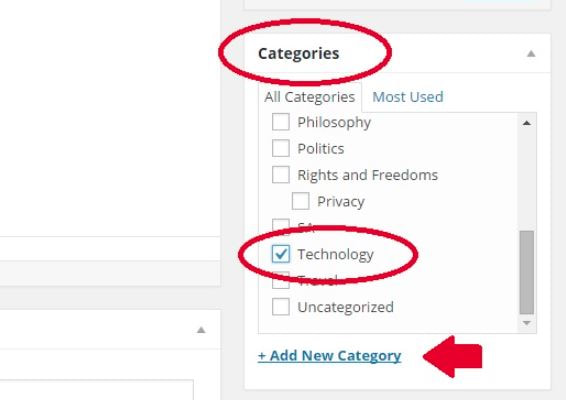
Create a new post with the proper Category. If you don’t have one defined, you can add new ones by clicking the Add New Category link as shown here:
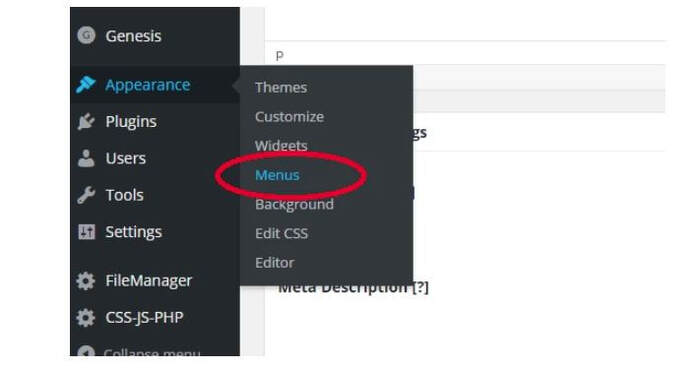
The next thing to do is to create a menu item that allows users to view all the posts in a given category. To do this, go to Appearance >> Menus on the left-hand side of the WordPress dashboard as shown here:

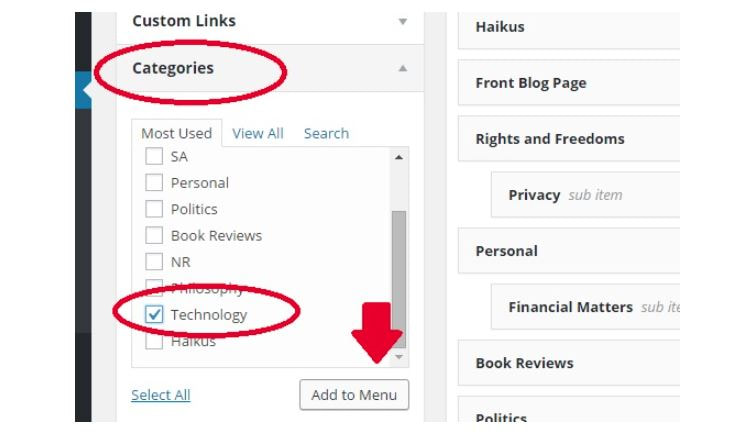
This will bring up the menu editing screen. Here you can choose items from the left-hand side and add them to the menu on the right. Here, scroll down to the Categories tab and expand it. Over here, place a checkmark next to the new category you just created and click Add to Menu.
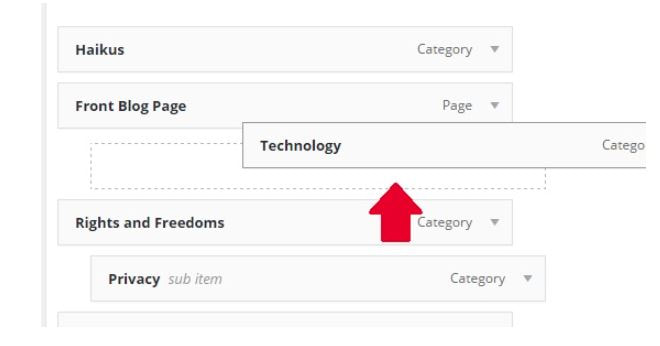
This will add the desired category to the existing WordPress menu. Note that you can drag-and-drop it to its desired location so you can control the order in which it appears:
Save your menu and visit your blog once again. This time, you should see your category appear in the main navigation menu on all your pages. Clicking this will bring up a list of all posts slotted under that particular category .


